Nicer Fastlane
· Fastlane - from zero to hero
Introduction
If you’ve been in mobile development for more than 2 minutes, you’ve heard of Fastlane. Either you’ve used it yourself and you’re a pro, or you’re just starting out and you’re a bit overwhelmed by the sheer amount of things you can do with it. Like any other incredible tool, the iceberg of information and tooling can be quite daunting. In this post, I’ll show you a few tricks and tips that I’ve picked up over the years that might help you get more out of Fastlane.
You’ll notice that a lot of these are Ruby-centric, but in case you missed it, Fastlane is written in Ruby, so it’s a good idea to get familiar with it! (at least until Fastlane with Swift comes out of beta)
Editor
First thing you’ll want to do is to set up your editor to work with Fastlane. You can of course use whatever editor you want, but I’ll show you how to set it up in VSCode (and as an extension of that, Cursor and any other VSCode-based editor).
The first plugin you’re going to want to install is Fastlane Snippets. It’s a simple plugin that allows for common shortcuts and snippets (duh) for things that you’re going to be writing a lot.
The second one will be the Ruby LSP plugin from Shopify. This is a language server plugin that will help you with syntax highlighting, autocompletion, and other things that you might expect from a language server.
These two alone will be more than enough to take you from the non-syntax highlighting, no autocompletion, no snippets world you’re probably used to editing Fastlane things in Xcode to a much more pleasant experience.
Formatting and linting
Just like we’ve got tools like SwiftLint and SwiftFormat, we’ve got tools for Ruby too. The most common one is Rubocop. It’s a linter and a formatter, and it’s very configurable. You can set it up to be as strict or as lenient as you want, and it will help you keep your code clean and consistent. Also, unless Ruby is the main language that you use on a day-to-day basis, it will also help you with the small pitfalls that you might not be aware of.
Installing Rubocop is as simple as any other gem, just add gem 'rubocop', require: false to your Gemfile, and run bundle install.
The require: false means that the gem will be installed but not automatically loaded when your Ruby application starts.
Now the next time you open and save your Fastfile, you’ll see all the issues that Rubocop has with your code, and you can fix them as you go. Rubocop can even auto-fix a lot of the issues for you, so you don’t have to worry about it.
Ruby versioning
You may want to have different versions of Ruby installed on your machine, or just have a manager to handle the versions for you. The one I use is rbenv. Installation is mega easy using Homebrew, and it really simplifies the whole “what version of Ruby do I need for this project” thing.
Theme 👀
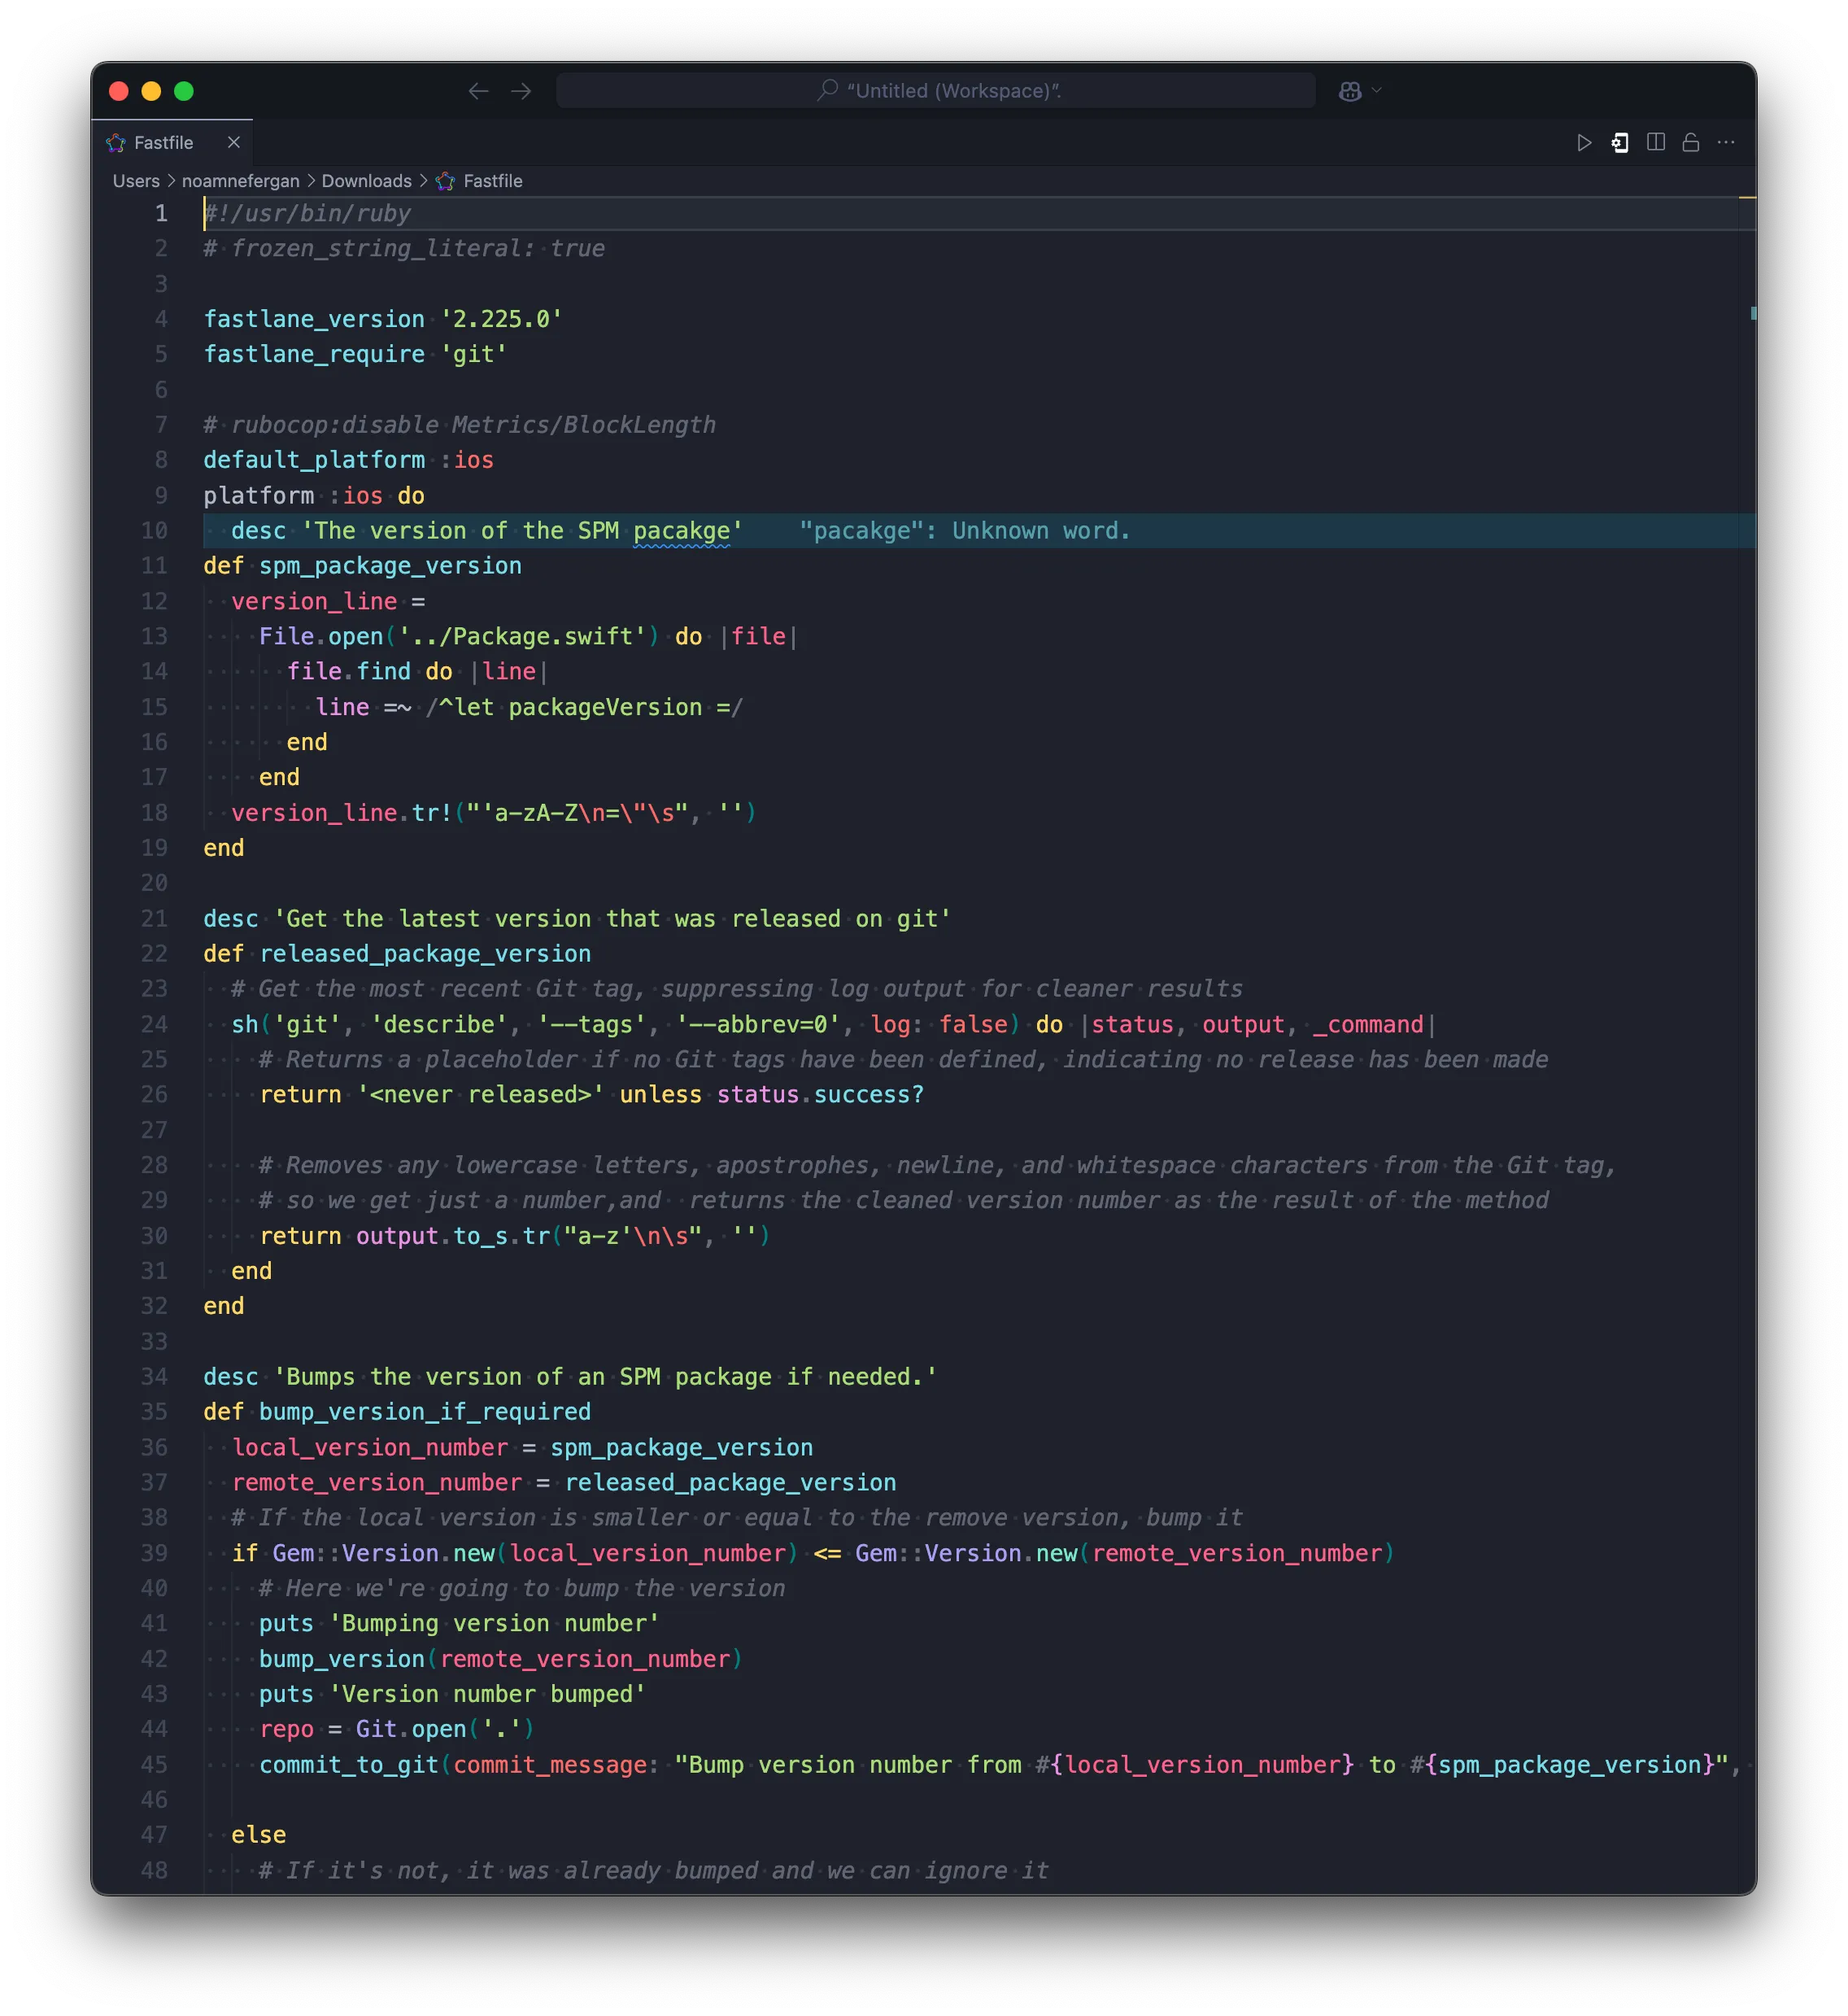
I know, I know, this is a bit of a personal preference, but I’ve found that using a theme that is easy on the eyes really helps with the whole “I’m going to be staring at this for hours” thing. I use the Monokai theme from BeardedBear, and I love it. They’ve got a bunch of other options, even some light mode ones if you’re into that sort of thing.
Results
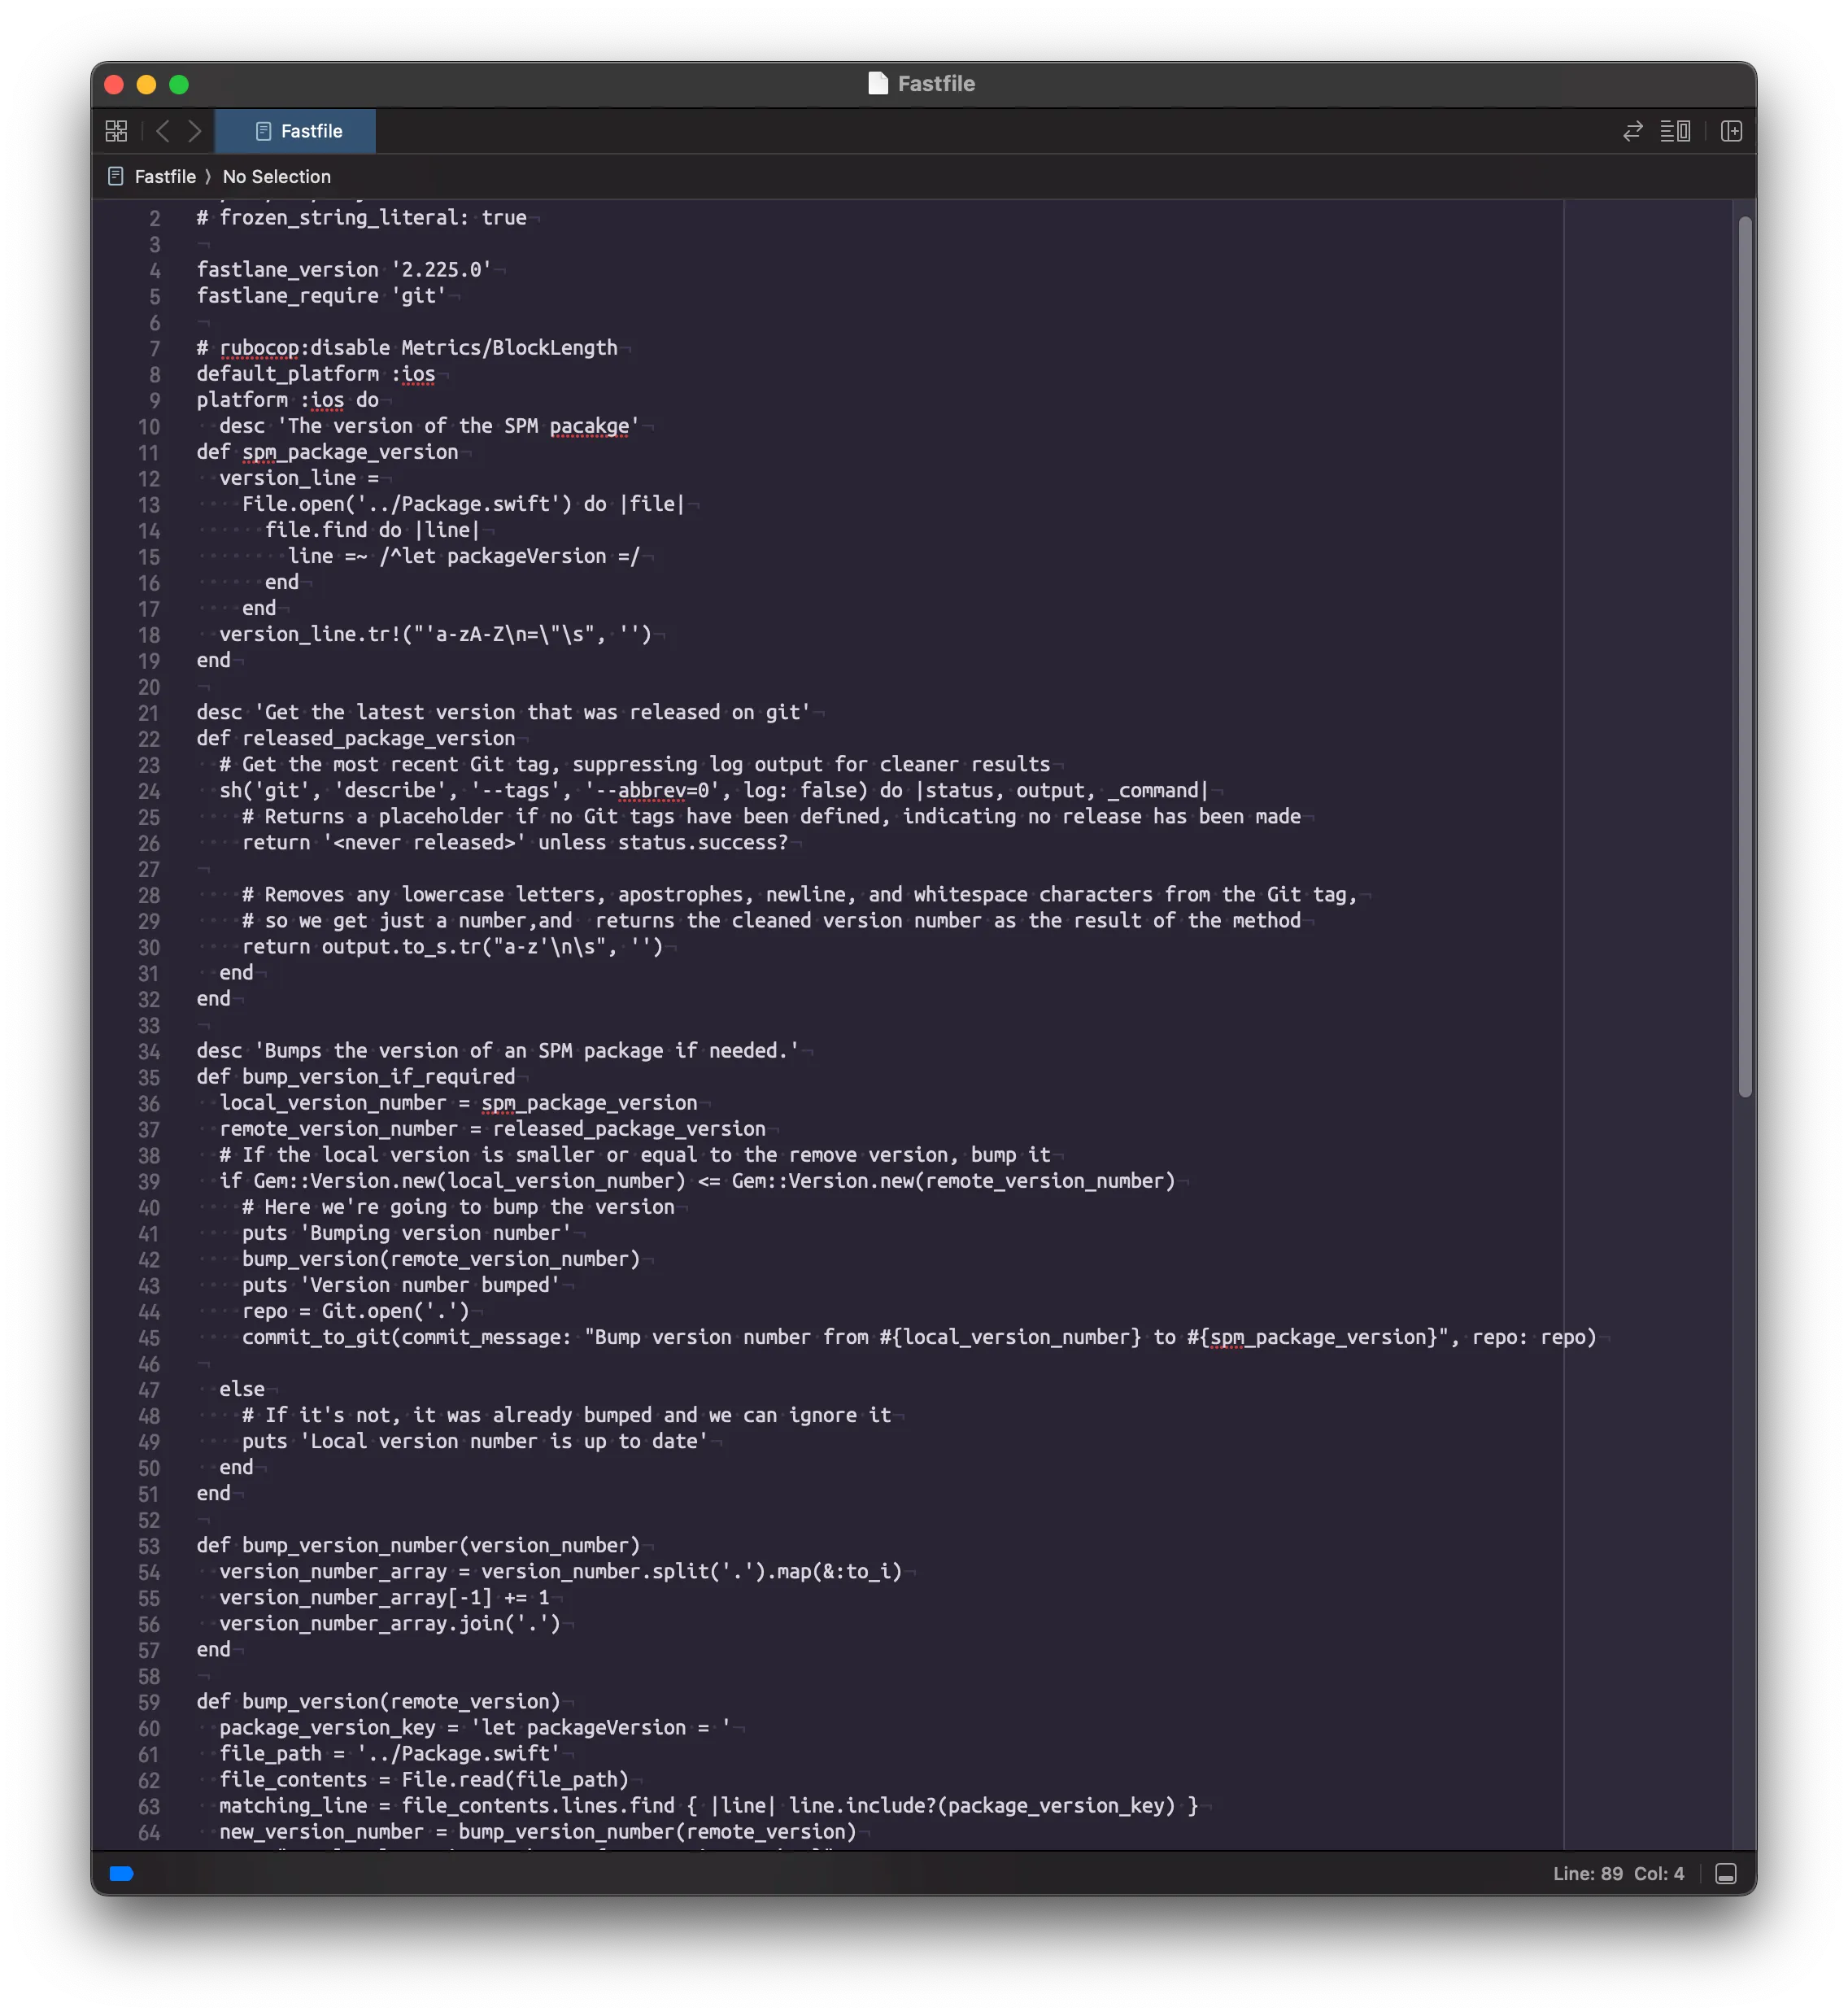
Congratulations! You’ve now got a much nicer dev experience when working on Fastlane. You’ve got syntax highlighting, autocompletion, snippets, linting, formatting, and even a nice theme to look at. You’re all set to take on the world of Fastlane!
| You’ve gone from this: | To this: |
|---|---|
 |  |
Conclusion
I hope you liked these small but impactful tips you can do to have a nicer Fastlane dev experience. I’d love to know if you’ve got other tools and tips that I’ve missed, let me know on socials!