Intro to scripting with Swift
Reasoning
As Swift developers (whether working with iOS, macOS, visionOS, or any other OS), we’re used to using Swift for building apps. But Swift has evolved and grown over the years, and now we can even use it for scripting. This allows us to leverage all of the qualities that we love about Swift, without wasting time googling syntax.
The Basics
As a Swift developer, you already know how to write scripts with Swift, you just may not know it yet. The basics of scripting with Swift are incredibly simple:
- Create a new file with a
.swiftextension - Write your Swift code
- Run the file with
swift <filename>.swift
Yes, it’s that simple. Let’s give it a try:
import Foundation

let name = "Noam"

func greeting(for name: String) -> String {
    return "Hello, \(name)!"
}

print(greeting(for: name))
I know, I know, what an exciting script. But it’s a start! All we need to do now is create a file with this incredibly simple script and run it with swift <filename>.swift.
You can just copy the above, and run pbpaste > Greeting.swift in your terminal, and then run swift Greeting.swift.

Great job! You’ve just written your first Swift script. Now let’s dive a bit deeper.
Passing Arguments
This greeting is good and all, but as I’m sure you could’ve guessed, it’s a bit simple and hardcoded. Let’s make it more dynamic by passing the name as an argument.
import Foundation

func greeting(for name: String) -> String {
    return "Hello, \(name)!"
}

if CommandLine.arguments.count > 1 {
    let name = CommandLine.arguments[1]
    print(greeting(for: name))
} else {
    print("Please provide a name")
}
You know the drill: copy the above, save it to a file, and run it with swift <filename>.swift <your name>.

Hurray! Look at you, passing arguments to your script like a pro.
You’ll notice that the arguments passed in are stored in the CommandLine.arguments array, and the first argument is the name of the script itself.
User Input
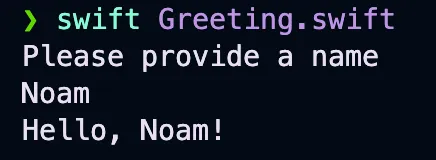
Now, while this script works, it requires us to know that a parameter is required and what that parameter is. Let’s make it more user-friendly with a readLine prompt.
import Foundation

func greeting(for name: String) -> String {
    return "Hello, \(name)!"
}

if CommandLine.arguments.count > 1 {
    let name = CommandLine.arguments[1]
    print(greeting(for: name))
} else {
    print("Please provide a name")
    if let name = readLine() {
        print(greeting(for: name))
    }
}
 Now we’re getting somewhere! This script will prompt the user for a name if one isn’t provided as an argument.
Some Pizazz
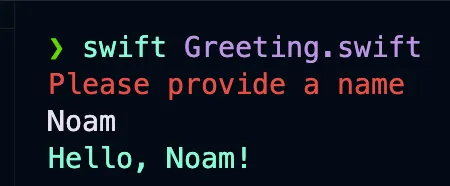
As a command line script, we can also leverage the power of the terminal. Let’s add some color to our script.
import Foundation

func greeting(for name: String) -> String {
    return "Hello, \(name)!"
}

if CommandLine.arguments.count > 1 {
    let name = CommandLine.arguments[1]
    print("\u{001B}[0;32m" + greeting(for: name) + "\u{001B}[0;0m")
} else {
    print("\u{001B}[0;31mPlease provide a name\u{001B}[0;0m")
    if let name = readLine() {
        print("\u{001B}[0;32m" + greeting(for: name) + "\u{001B}[0;0m")
    }
}

As you can see, we can use all of the fun parts of the terminal, like adding colors, supporting ASCII art, and more.
File I/O
While writing CLI tools and commands is fun, handling files is a common task for scripts. Let’s write a script that writes to a file, then reads it and prints it to the console.
import Foundation

let filename = "test.txt"

func writeToFile(_ filename: String, contents: String) {
    do {
        try contents.write(toFile: filename, atomically: true, encoding: .utf8)
        print("Wrote to file \(filename)!")
    } catch {
        print("Failed to write to file \(filename)")
    }
}

func readFromFile(_ filename: String) -> String? {
    do {
        return try String(contentsOfFile: filename, encoding: .utf8)
    } catch {
        print("Failed to read from file \(filename)")
        return nil
    }
}

func readAndWrite(name: String) {
    writeToFile(filename, contents: "Hello, \(name)!")
    print("Contents of the file: \(readFromFile(filename)!)")
}

if CommandLine.arguments.count > 1 {
    let name = CommandLine.arguments[1]
    readAndWrite(name: name)
} else {
    print("\u{001B}[0;31mPlease provide a name\u{001B}[0;0m")
    if let name = readLine() {
        readAndWrite(name: name)
    }
}
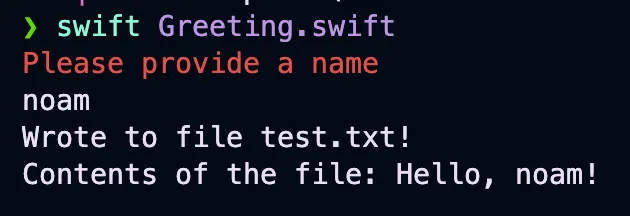
And like before, we’ll save this to a file, and run it with swift <filename>.swift.

As you can see, we are now both reading and writing from a file. This is a common task for scripts, and Swift makes it incredibly easy and, more importantly, safe.
Additional Resources
The French Connection conference has recently released their talk videos, including an excellent presentation by Natan Rolnik about this very topic! You can check out his talk here, and visit his blog at swifttoolkit.dev.
Conclusion
As you’ve seen, writing scripts in Swift is incredibly easy. This can be expanded upon almost endlessly - the obvious next step is compiling an executable. You have all the power of Swift, with its type safety and elegant syntax, at your disposal. So go ahead, write some scripts, and have fun with it!